
Why Your AC Makes Water in the First Place
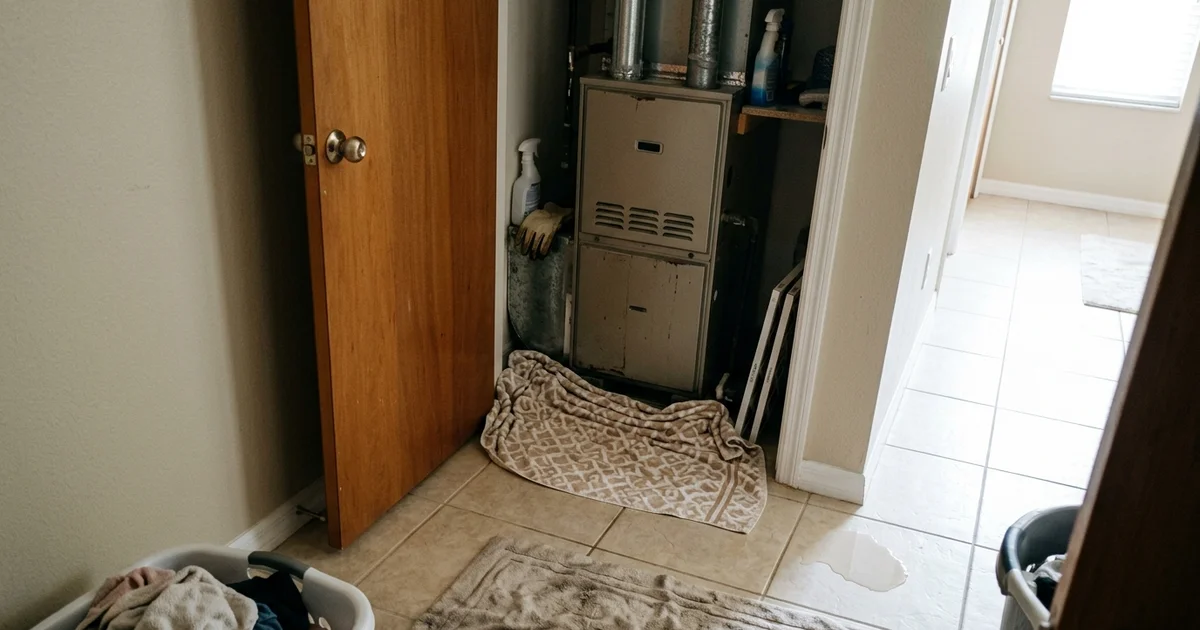
Discovering your ac leaking water inside house is incredibly frustrating, especially on a hot summer afternoon. That water is actually a normal byproduct of the cooling process, because your system dries the air as it cools your house.
Warm, humid air passes over the cold indoor evaporator coil, causing moisture to condense just like water beads on a glass of iced tea. That condensation drips into a primary pan and runs out a PVC drain line to the outside of your house.
On a humid Eastern Shore day, a typical three-ton system can pull anywhere from 5 to 20 gallons of water out of your indoor air.
When that water ends up on your floor instead of the yard, a specific part of the drain path has failed. Our local line for AC repair in Daphne reaches a licensed contractor 24/7 if you need someone out today.
The following guide breaks down the data behind these leaks and explores practical ways to respond.
Do this first
Turn the AC off at the thermostat, lay down towels, and if the unit is in the attic, check the ceiling below for stains. Then look for the cause below.
The Four Usual Causes
The most frequent reason your AC leaks water is a clogged condensate drain line, followed by a tripped float switch, a rusted drain pan, or a frozen evaporator coil. Identifying the specific symptoms will tell you exactly which of these four components failed. We see these specific issues constantly during the peak cooling season.
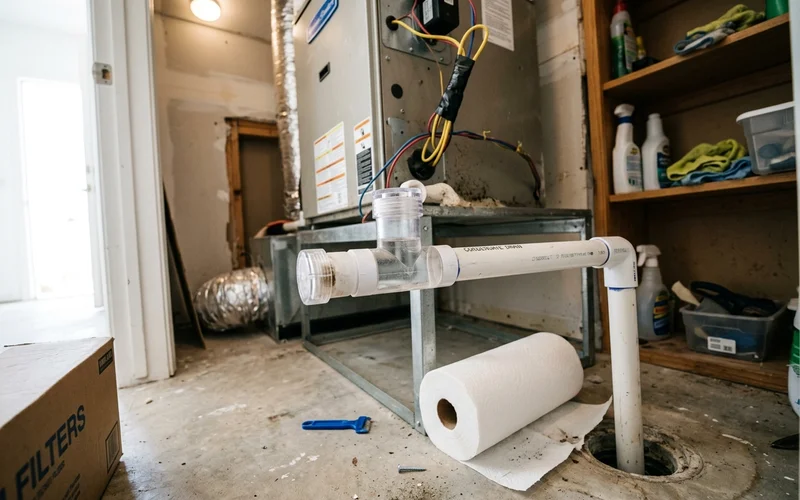
1. Clogged condensate drain line. Warm, wet PVC drain lines create the perfect environment for algae and bacterial slime to grow, especially in Gulf Coast heat. An ac drain line clogged with dust and slime causes water to back up into the pan and spill over.
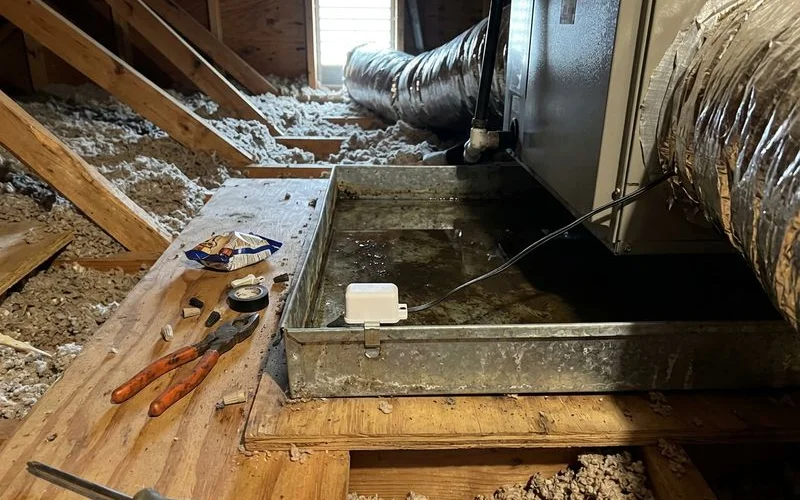
2. Float switch trip. Modern systems usually have a safety float switch, mandated by the International Mechanical Code (IMC) for attic units, located in the secondary pan or on the drain line. A rising water level lifts the float and cuts power to the AC thermostat to prevent a flood. Your system stopping suddenly with a full drain pan means the switch did its job, but the clog still requires clearing.
3. Cracked or rusted drain pan. Older galvanized steel metal pans typically rust through from the inside after 10 to 15 years of holding water. Plastic pans become brittle and crack over time due to temperature fluctuations. Water will leak out of the bottom of a cracked pan even when the main drain line is completely clear.
4. Frozen coil melting. A dirty air filter restricts airflow, which causes the indoor evaporator coil to drop below freezing and build up a thick layer of ice. The system shutting off allows that ice to melt rapidly, dumping more water at once than the standard pan can physically handle.
| Clue | Likely cause |
|---|---|
| AC stopped, water in the pan | Clogged drain, float switch tripped |
| Water leaking with a clear drain | Cracked or rusted pan |
| Ice on the copper lines before the leak | Frozen coil melting |
| Drips from a ceiling vent | Sweating duct or boot, not the drain |
How Fast Should You Act?
You must act immediately, as the Environmental Protection Agency (EPA) states that mold can begin growing on wet drywall and insulation within 24 to 48 hours. Standing water turns a simple AC repair into a costly home restoration project very quickly. We always advise homeowners to treat an active leak as an urgent situation, especially if water reaches anything other than a tile floor.
A leak from an attic unit easily soaks through ceiling drywall in just a few hours. Recent 2026 data from Angi shows that repairing a water-damaged drywall ceiling costs $600 to $1,500 on average. Replacing a rusted drip pan is significantly cheaper than paying for professional mold remediation and new ceilings. Our network of licensed contractors can help you address the leak before it causes structural issues. Quick action keeps your repair costs strictly focused on the HVAC equipment.
Water Damage Warning: The EPA advises drying all wet building materials within 24 to 48 hours to prevent dangerous mold growth.
What You Can Do, and What to Leave Alone
You can safely flush the drain line with vinegar or clear a clog using a wet-dry vacuum, but you should leave pan replacements and coil issues to a licensed professional. Attempting to fix internal AC components without proper training often voids the manufacturer warranty. We encourage homeowners to handle basic drain line maintenance themselves.
You can perform a few safe maintenance steps yourself:
- Vinegar flush: A monthly pour through the clear PVC cleanout pipe helps prevent the algae clogs that cause most backups.
- Reference guide: The step-by-step guide on flushing your drain line shows exactly how to perform this maintenance safely.
- Vacuum extraction: A standard 5-peak horsepower wet-dry shop vacuum can successfully pull a stubborn clog out from the outdoor end of the discharge line.
The licensed contractors we connect you with should handle the more complex mechanical repairs. Re-routing a poorly sloped drain line, installing a new IMC-compliant float switch, or replacing a rusted metal pan requires specialized tools. Anything involving a frozen evaporator coil usually points to a low refrigerant charge or a failing blower motor, which demands professional diagnostic gauges. We strongly suggest leaving these specific repairs to the experts. This ensures your system operates safely.
How to Prevent the Next Leak
Most indoor AC leaks are completely preventable by implementing a few monthly maintenance habits during the cooling season. Keeping the drain clear and the filter fresh stops the two most common causes of water damage. We recommend adding these quick checks to your regular household routine.
Here are the most effective habits for leak prevention:
- Flush the drain monthly from April through October with a cup of distilled white vinegar through the cleanout.
- Change the filter on schedule. A standard MERV 8 filter catches dust without restricting airflow, preventing the coil from freezing and overflowing the pan when it melts.
- Check the secondary pan under attic units a few times each summer. Water sitting in this backup pan means the primary main drain is already struggling.
- Make sure there is a float switch. Attic air handlers located above living spaces require a UL 508-compliant float switch to meet modern safety codes. It shuts the AC off before the pan overflows.
- Keep the outdoor end of the drain clear. Landscaping mulch, soil, and wet grass clippings easily bury the pipe and block the water from exiting.
- Book a yearly tune-up so your local HVAC contractor can flush the line fully with pressurized nitrogen and check the aging pan for rust.
Why Older Eastern Shore Homes See More Leaks
Older homes in Daphne, Fairhope, and Spanish Fort often suffer more leaks because their original metal drain pans have been holding standing water for over a decade. These aging attic and closet installations also frequently lack the modern secondary safety switches required by current building codes. We see these specific legacy issues in dozens of local neighborhoods.
The Danger of Aging Drain Pans
Many local systems sit in the attic with galvanized metal drain pans that have endured fifteen humid Gulf Coast summers. Metal pans inevitably rust through from the inside, creating invisible pinhole leaks. Drain lines in older installations often lack a proper P-trap or an accessible clear cleanout port. This missing plumbing makes the lines significantly harder for homeowners to keep clear of algae.
If your system is older and the leaks keep coming back, ask the contractor whether a new pan, a re-routed drain, or a modern float switch makes sense. Upgrading to a durable polymer plastic pan or adding a simple safety switch provides massive peace of mind. These are usually modest repairs compared with the high cost of replacing a stained ceiling and wet insulation. Our goal is to help you avoid those catastrophic secondary damages. Proactive upgrades protect your home.
Getting It Fixed
Finding water around indoor ac unit components means the system needs professional attention. A licensed contractor will pinpoint the failure and stop the water before it ruins your drywall. We make finding that professional help completely stress-free.
You can call for help at (251) 850-5502 to secure a fast appointment. Our dispatch team will connect you with a licensed, insured contractor serving your specific Eastern Shore town, usually on the exact same day. The local contractor will clear the drain, check the pan and float switch, and give you a free estimate before beginning any actual repair work. Prompt attention protects your house from lasting water damage.